DIY Tinkerbell Costume
Well, these posts are taking longer than I’d hoped, but now that we made it past Josiah’s 6th birthday party I’ll try to speed things up.
I’ve already written about my littlest Peter Pan costume here. Now it’s time to talk about Tinkerbell.

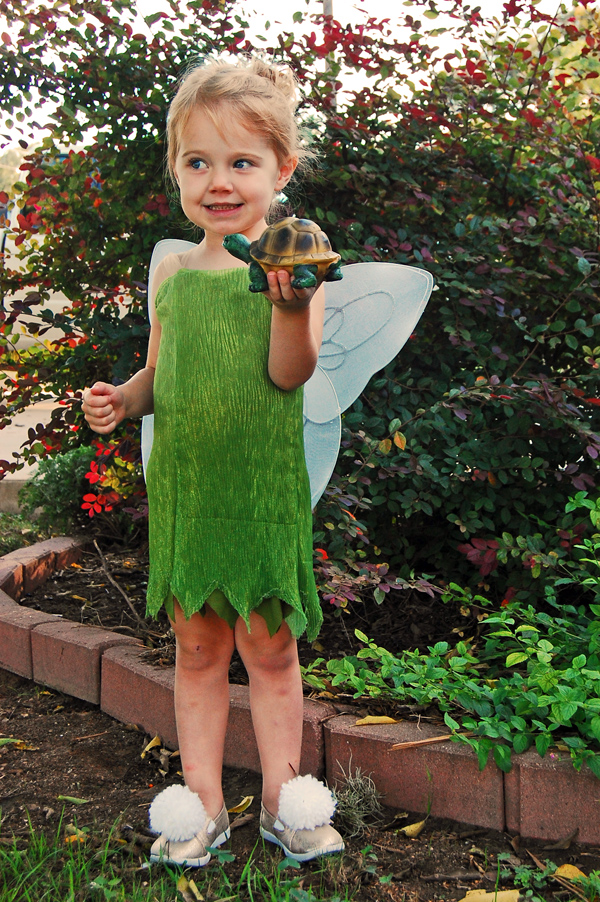
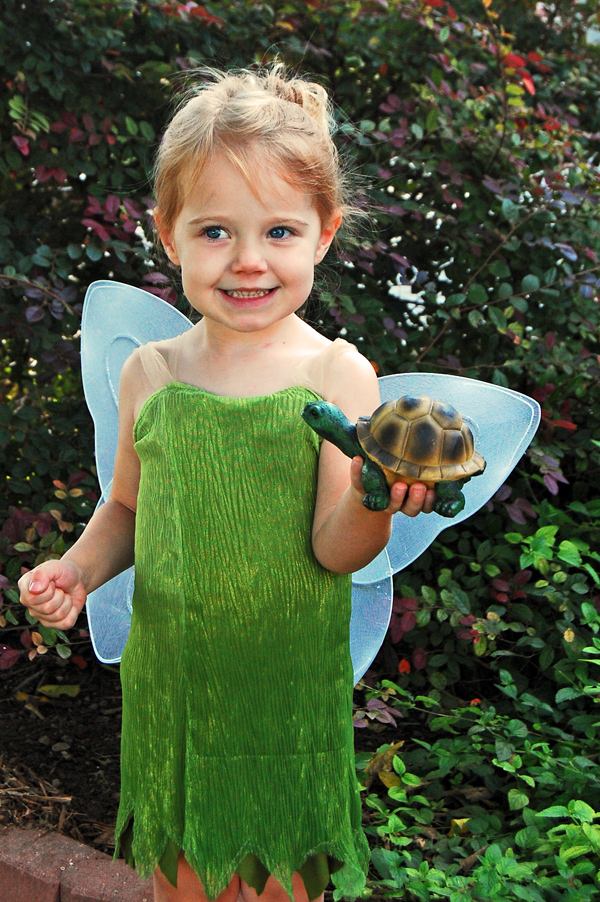
While Josiah took to the last second to make a decision on a costume, Audrey knew from the beginning that she wanted to be Tinkerbell. I figured it would be easy enough since she looks like her. I think she turned out pretty cute if I do say so myself!


I wanted to try and make something that looked like the actual Tinkerbell from the different movies, not just a green tutu dress that is Tinkerbell inspired. I looked around the web for tutorials or pictures to help. I did find some handmade costumes for sale that looked like I wanted but didn’t find any tutorials. Ken and I were at JoAnn’s and I was looking around at all their green fabric to see what could work. I wanted something comfortable. I found some green knits but nothing quite light enough. Then I saw another pretty fabric that was a shimmery and looked like leaves because of the texture of it. In the newer Tinkerbell movies her dresses are made of leaves so I liked copying that. The fabric was a bit sheer though so I bought the knit fabric to go under it. I figured extra layers would help keep her warmer in this minimal dress as well.

I used another sun dress that she has as my reference for size. I made the under layer first. It is very simple with just front and back pieces. I cut it long so that I could cut the bottom later. I really didn’t want to end up with it being too short. The top layer I made using four pieces. I really just made it up as I went and kind of winged it. I was inspired by this. I did use her measurements though. I also had to try both layers on her a couple times and take in the sides or make other adjustments to make it just right. After getting the two layers the way I wanted I put them on her again to measure how much tulle would be needed for the straps. Tinkerbell’s dress doesn’t have straps but we’re not doing that on a 3 year old. I did want to give the illusion a bit though so I bought a quarter yard of nude colored tulle for a few cents at Hobby Lobby.
Note: You may notice a crease in the different parts of the dress. I’m assuming that is where it was folded on the bolt. I prewashed both green fabrics and am surprised it didn’t come out. I really wasn’t paying attention to it and didn’t notice it until I was finished. I don’t know if that kind of fabric can be ironed or not. If you know tell me in the comments. But really, it wasn’t too noticeable in real life.


I pinned the two layers together and the tulle in between them as well. I also tried it on her to make sure I was putting the straps in the right place. The dress is FAR from perfect if you look at the seams closely but I try not to worry too much about a costume that will only be seen a few hours. After it was all pinned I sewed two rows around the top and backstitched over the straps to make sure they were extra strong.
Finally, I put it back on her and just needed to measure how much to cut off the bottom to make the skirt with the cutouts. I debated sewing the layers together or doing other things but ended up just not worrying and just cutting the two layers to match (although they often lay in different positions when she moves). I just kind of eye balled it. I was afraid that the top leafy layer was starting to fray so I did a zig zag stitch close to the edge all the way around just to keep it from fraying too far. I kind of liked the added detail. Knit doesn’t fray so I left it alone.

Surprisingly, the hardest thing for me to find was the wings. I looked everywhere….at least twice. Finally, I ended up accidently seeing at the 11th hour that a local gift shop was selling Halloween accessories and I popped in to find that they indeed had angel wings for only $3.50! I had been seeing every type of wing imaginable in my quest for good Tinkerbell wings but they were every other color of the rainbow. I also saw some really awesome fairy looking wings but they were around $18. Um, no. Can’t do it. You may be asking yourself why I didn’t just make some. Well, I could have but I really just wanted to keep this simple and not go through the trouble of trying to form coat hangers and get the panty hose to work etc. I just figured this would be an easy short cut. Who knew it’d be so hard? But in the end the angel wings (with halo) worked great. They definitely looked more to me like fairy wings than angel wings. I did bend the corners of all four wings though to make them a bit more pointy and fairy-like.

Because there was such a large piece of cloth in the middle of the two halves I wanted to disguise it a bit so it wasn’t so obvious that it was fake wings on her back. I wanted them to look like they were just coming out of her dress…you know, like a really fairy would. I also didn’t want to use the arm straps that came with it because that would detract from the look. I didn’t want to cut the straps off though so that when Audrey plays with them later at home she can just slip the wings back on.

So, I used a scrap of fabric leftover from cutting the top dress layer and just wrapped it around the middle a few times and then safety pinned it down. Then I just slid the straps under the cloth and they stayed put.

I safety pinned the wings to the back of her dress. I actually didn’t do this until we got to the Fall Festival because wings and car seats don’t mix.

Tinkerbell wears huge pom-poms on her shoes. These are super easy to make. I grabbed some white yarn that I already had and cut out a piece of cardboard to wrap it around. Choose the cardboard width to be half the diameter of the finished pom pom. There are tons of tutorials online on how to make them. Here is one.

At first I had trouble figuring out how I would attach the pom poms without hurting the shoes. But then I had a flash of brilliance and remembered some barrettes I had bought long time ago to use for something else. Thank goodness for hoarding supplies! I simply used another long piece of yarn, tightly tied it around the center of the pom so you couldn’t see it and then tied it to the barrette.

Then all we had to do was clip it to the top of the shoe.

I had been going back and forth about what she should wear for shoes. Tinkerbell wears green shoes but I don’t see those often and wasn’t sure how to make them. Finally, I decided that she could just wear some brown mary janes that she has but I was staring at her new gold shoes and thought that even though they aren’t true to the movies, they were fairyish and would also be comfortable for lots of walking.

And I think they turned out pretty cute!
At the last minute before we left I finally had a chance to look up how to do a sock bun. I had heard of them but hadn’t never seen how one was actually done before. I watched the first youtube video that popped up on Google and it looked very easy. I found an old sock that had no mate, cut it and started wrapping it around Audrey’s hair. First of all, it is always hard for me to pull her hair back because of the way her hair lies. It does not like all going back in one direction. Lots of lumps happen. Second, her hair is still very thin so it really wasn’t enough to fully cover the sock and it kept trying to slide out all night. But I just kept tucking it back in and it looked good enough. For someone with fuller hair this is definitely an easy way to get the Tinkerbell hair look. Oh, and this photo shoot was done after Halloween so her hair was done quickly just for the photos. It actually was a bit better on the actual night.
Okay, well, about wraps things up. If you have any questions please ask! I hope to get the last costume written about before Thanksgiving. haha!

DIY Tinkerbell Costume Read More »
